Ridn9high

Moderator
Moderator
Joined
Sep 21, 2004
Messages
1,710
Reaction score
51
I finally got around and made a little trademark that I want to put on all my pictures. I would like to know how to pull the object from the original background with out having to trace the whole object. Here is the text I made and hopefully someone can help with the easy task. It is a mind boggler for myself at this point
<


[attachment=37157:attachment]
 

Attachments

  • copy.jpg
    copy.jpg
    29.8 KB · Views: 2

Shane

Well-known member
Joined
Nov 13, 2001
Messages
940
Reaction score
1
Did you create it in Photoshop?
Is the graphic on its own layer?
Is that layer transparent?

If not, what is the largest image you have of this logo?
 

Ridn9high

Moderator
Moderator
Joined
Sep 21, 2004
Messages
1,710
Reaction score
51
I did create it in photoshop and it does have its own layer. Not sure about the transparent layer though.
Thanks for any help that you might be able to offer
<
 

Shane

Well-known member
Joined
Nov 13, 2001
Messages
940
Reaction score
1
Good, If the logo was built on a layer that wasn't first filled with a solid color, you can just size the logo (on that layer) down to 100% of what you want it to be on the photos, then just click on that layer (in the layer palette) and drag it to the photo. The transparency around the image will follow over to the new image and will create a new layer on top of the photo. There you can move the logo around and then either flatten and save, or File>Save for Web, or Save As, or whatever you want.

Feel free to send the PSD file to me and I'll take a peek at it.
shane at jesseshunting dot com
 

foulshot

Well-known member
Joined
Oct 2, 2001
Messages
4,706
Reaction score
0
Shane, isnt there also a way to make it a brush?(custom???)
 

foulshot

Well-known member
Joined
Oct 2, 2001
Messages
4,706
Reaction score
0
Mike,
That is a pretty cool logo. Mind sharing the steps you used to make it?
 

Ridn9high

Moderator
Moderator
Joined
Sep 21, 2004
Messages
1,710
Reaction score
51
Foulshot,
Here is a a few steps in how I made that image. If you have any questions feel free to ask.

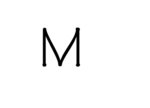
1). First I typed an "M" on the new layer
[attachment=37172:attachment]


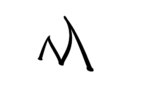
2). Now click on the right button of the mouse. On the bottom of the pop-up screen is "WARP TEXT".
a). Click on Warp Text
aa).Now click on sytles.
There are many different ones to choose from, I used the "Shell Upper" style.
[attachment=37173:attachment]

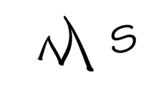
3). For the "S" I did the same as step (1) and (2).

[attachment=37174:attachment]


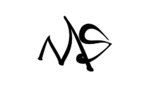
4). Merge the text "M" and "S" to where you like

[attachment=37175:attachment]


5).On right side of screen is "STYLES AND EFFECTS" Open this table and TWO selection bars will appear. The bar on the left reads (EFFECTS, FILTERS AND LAYER STYLES)

Use the EFFECTS and then on the second bar use the TEXT EFFECTS

Grab the BRUSHED METAL and drag to the "S"

Now change your layer to the "M" layer and then do the same as above.


[attachment=37177:attachment]
 

Attachments

  • Logo.jpg
    Logo.jpg
    26.7 KB · Views: 2
  • Logo1.jpg
    Logo1.jpg
    29.1 KB · Views: 2
  • Logo2.jpg
    Logo2.jpg
    33.2 KB · Views: 2
  • Logo3.jpg
    Logo3.jpg
    34 KB · Views: 2
  • Logo5.jpg
    Logo5.jpg
    33.7 KB · Views: 2

Hideandwatch

Well-known member
Joined
Jul 26, 2002
Messages
1,306
Reaction score
1
nice work Mike, and some good info Shane...I have been trying to find a diferent way to sign my photos to not show the sig so highlighted, and I found it in the process that you explained. Thanks!
 

Latest Posts

QRCode

QR Code
Top Bottom